How To Do Chunky Highlights at Home
The bold look from the nineties is back



In the late ’90s and early 2000s, blended highlights took a backseat to a much bolder color trend: chunky highlights. Twenty-something years later, the look is back with a more modern finish that feels intentional rather than overdone. If you are curious about trying chunky highlights at home, the key is understanding placement, contrast, and aftercare before you pick up bleach.
This statement-making technique works by lightening thicker sections of hair to create noticeable contrast against your base shade. Whether you want subtle face-framing pieces or a more dramatic all-over effect, we’re breaking down the nostalgic trend and sharing tips for getting the statement look at home. Below, you will find everything you need to know to master this bold trend on your own terms.
The term “chunky highlights” refers to a highlighting technique that involves lightening thicker sections of hair than traditional highlights. The goal is to create a piecey look with a stark, noticeable contrast between your base color and your highlights. Chunky highlights can either be applied all over or focused on your face-framing strands, in which case, they’re usually referred to as money pieces.
If you’re struggling to decide between blended highlights vs. chunky highlights, consider your end goal. Traditional highlights are usually finer and more diffused, while chunky highlights use wider sections for a stronger visual contrast. That thicker placement can also create a more dimensional effect, especially when the highlight color is several levels lighter than the base. The look is less about subtle brightness and more about visible shape and statement.
Yes, chunky highlights are absolutely in style, but they have been beautifully modernized for today. The current iteration leans into the ongoing Y2K revival trends while incorporating updated application methods. Instead of the harsh, blocky patterns of decades past, modern versions favor a slightly softer placement around the crown and beautifully blended face-framing pieces. This gives you all the nostalgic attitude you want without looking outdated.
Chunky highlights can work on a wide range of hair lengths and textures, from sleek straight styles to chunky highlights on curly hair with more natural movement. This style is also very versatile in terms of hair color—chunky highlights on blonde hair work just as well as chunky highlights on dark hair.
The main factor is contrast, so if you like bold definition, dramatic framing, or visible ribbons of color, this trend can be a great fit. However, if you prefer a softer, more natural result, try placing just a few larger highlights near the face, which may feel easier to maintain.
While you can hit the salon to achieve this trendy look, it’s not necessary. With the right tools and techniques, you can DIY it, too. If you’re up for the challenge, here’s how to highlight your hair at home.
Before you begin highlighting your hair, you’ll need to pick up a hair bleach or highlighting kit to lighten your strands. We’re like the L'Oréal Paris Féria Hyper Platinum Advanced Lightening System Bleach, which can lighten your hair up to eight levels. This advanced hair lightening system delivers crystal-clear platinum blonde results for weeks, making it ideal for transforming dark brown hair to light brown. To use it, you mix the lightening powder and developer according to the enclosed instructions before painting it onto your designated strands. To mix and apply your bleach, you’ll want to grab a plastic mixing bowl, a small brush, rubber gloves, and aluminum foil. The latter will help ensure a precise, targeted application when you begin lightening your hair.



If you’d rather skip the mixing and hand-painting, you can also pick up a highlighting kit. The L'Oréal Paris Colorista At-Home Hair Bleach and Lightener is our top pick, as it comes with nearly everything you’ll need to create chunky highlights, including bleach, developer, lightening cream, and an easy-to-use application brush for evenly spaced highlights. This customizable DIY bleach option is inspired by professional salon looks and can be used to create all-over color preparation. You simply apply the mixed creamy formula using the specialized brush to lift your color cleanly.
Next, don an old T-shirt, one you don’t mind getting bleach stains on, or cover your shoulders with a white towel. Then apply petroleum jelly to your hairline, ears, and the back of your neck to create a barrier and prevent the bleach from coming into contact with your skin. We recommend highlighting in the bathroom, in front of the mirror, for the best results. If there’s anything in the vicinity that you wouldn’t want to get splattered with bleach stains, move it. Mistakes happen, even to skilled colorists.
Once you’ve prepped your workstation and selected your bleach, you can begin sectioning your hair. For all-over chunky highlights, we recommend dividing your hair into four equal sections, then sectioning out half-inch strands from the underside of each section, working your way to the top. We suggest securing each section with a small clip to help keep it separated from the hair you don’t want to lighten.
If you want to experiment with face-framing blonde hair chunky highlights, tie most of your hair back and section out an inch-thick section on either side of your face. Keep in mind that if sectioning your hair seems intimidating, you can also use a highlighting cap to make the work easier. Just be sure to select a highlighting cap designed for chunky highlights, not one for thin streaks.
From here, you can begin applying bleach to the strands of hair you want to highlight. Mix the formula as instructed on your chosen bleach, then apply it to your strands. We suggest starting at the mid-strand and working your way to the ends before applying bleach near your scalp. Once the strand is fully saturated, wrap it in aluminum foil and move on to the next streak. Continue this process until you’ve applied all of your highlights, then sit back and let the color process. The exact wait time depends on the bleach you’re using. Again, refer to the package instructions for accurate guidelines.
Once your timer goes off, hop in the shower and rinse your hair thoroughly to remove the bleach. Then, apply the post-bleach conditioner included in your kit to help replenish and hydrate your hair. If your highlights appear brassy, which can happen after lightening dark hair, you can also use a toner, like the L'Oréal Paris Féria Power Toner Long-Lasting Anti-Brass Toner, to help minimize unwanted warmth. This demi-permanent anti-brass toner eliminates brassiness and adds cool tones to reduce unwanted warmth in as little as five minutes. To use it, apply the ammonia-free formula to damp hair after rinsing your bleach, let it process for 5 minutes, then rinse thoroughly for a refreshed tone that lasts up to 3 weeks.
Lightened hair needs more support than untreated hair, especially if you want your color to stay glossy and your strands to stay strong. A good maintenance routine helps preserve tone, softness, and shine.
Lightening your hair always involves chemical alteration, which means a dedicated aftercare routine is essential. To support your strands, you need a system that strengthens weakened bonds and reduces breakage.
Start your routine with the L'Oréal Paris EverPure Sulfate-Free Bond Repair+ Shampoo, a gentle, sulfate-free shampoo designed to strengthen and repair weak hair bonds. Formulated with a Bond and Amino Acid Complex, it helps rebuild hair damaged by color treatments. You simply massage it into wet hair, work it into a rich lather, and rinse completely.
Follow up with the L'Oréal Paris EverPure Sulfate-Free Bond Repair+ Conditioner, which is a gentle, sulfate-free conditioner designed to strengthen and rebuild weak hair bonds. It helps repair color-treated or damaged hair while preventing future breakage and restoring softness. After shampooing, distribute it evenly through your mid-lengths and ends, let it sit for three minutes, and rinse.

For deeper post-lightening care, swap your conditioner once a week for the L'Oréal Paris Feria Strength Repair Ultra Care Conditioner. This post-color conditioning treatment is formulated to repair, strengthen, and protect color-treated hair from future damage. Infused with Citric Acid, this treatment helps strengthen hair against breakage and extends color vibrancy. Apply a generous amount to clean, wet hair, leave it on for several minutes to deeply hydrate the hair fibers, then rinse.

Bleached strands can sometimes lose their luster and become rough. To ensure your chunky blonde highlights remain highly reflective, you need a product regimen dedicated to shine enhancement, preventing dullness, and smoothing rough texture.
Cleanse your hair with the L'Oréal Paris Elvive Glycolic + Gloss Shine Boosting Shampoo, a Glycolic Acid-powered shampoo that gently cleanses while laminating the hair cuticle for instant high shine. It transforms dull, lackluster hair into glossy strands. Apply it to wet hair, massage into a lather, and rinse.
Next, use the L'Oréal Paris Elvive Glycolic + Gloss Shine Boosting Conditioner from the Elvive Glycolic + Gloss system, which helps smooth dull, lackluster hair. The formula helps hair reflect maximum light for a gorgeous finish. Distribute it through your hair after shampooing, leave it on for two minutes, and rinse.
Finish your styling prep with the L'Oréal Paris Elvive Glycolic + Gloss High Shine Leave-In Serum. This lightweight leave-in treatment is powered by a 4% Glycolic Acid Complex to boost shine and smooth dull hair. It laminates the hair shaft to deliver long-lasting softness without leaving a greasy residue. Apply a small amount through damp or dry hair before styling to seal in a glossy finish.

Heat styling can accelerate color fading and damage vulnerable bleached hair. Incorporating a heat protectant is a non-negotiable step for thermal protection, fading prevention, and preserving your carefully achieved tone.
Before using any hot tools, spray your hair with the L'Oréal Paris Elvive Dream Lengths Heat Slayer Leave-In. This leave-in pre-iron spray provides heat protection up to 450°F. The formula reduces frizz, hydrates hair, and seals in shine for up to three days of sleek hair. Shake the bottle well, then mist it evenly onto damp or dry hair before using your blow dryer, flat iron, or curling wand.
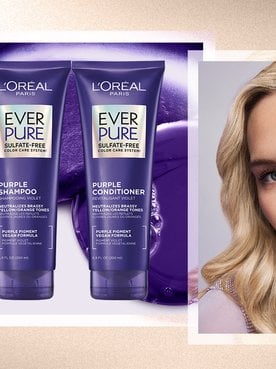
Lightened strands naturally oxidize over time from exposure to water, air, and styling, resulting in unwanted warm tones. Incorporating pigmented toning products into your routine helps minimize oxidation and keep your shade cool. If you have blonde chunky highlights, using a purple shampoo and conditioner, such as the L'Oréal Paris EverPure Sulfate-Free Purple Toning Shampoo and L'Oréal Paris EverPure Sulfate-Free Purple Conditioner, will counteract yellow tones. If you have chunky highlights on brown hair that start to show orange tones, a blue shampoo is the right choice to neutralize those deeper warm hues.

If you are ready to try this trend, there are several directions you can take depending on your base color and how bold you want the final result to look.
Pairing a darker blonde base with lighter ribbons is one of the easiest ways to ease into the trend. This tonal approach to chunky highlights creates visible contrast without looking too stark. It is one of the easiest ways to wear chunky blonde highlights if you want dimension without an extreme shift in tone.
If you want definition without going extremely bright, this version offers a softer contrast on brunette hair. Chunky highlights on dark hair can look especially striking when the highlighted pieces are placed around the face or through the top layers. The contrast is still noticeable, but the overall look feels easier to wear.
Money pieces are a low-commitment way to try the trend. Lightening only the front sections creates a bold frame around the face and requires less bleach than a full head application. This is a useful entry point if you want to experiment without committing to all-over chunky highlights.
Warm burgundy, auburn, or crimson sections can create a rich, statement look on brunette hair. Red chunky highlights are a good choice if you want contrast without going blonde, though they still require lifting first if your starting color is dark. Because double processing can leave hair feeling stressed, a bond-repair and conditioning routine is especially important here.
Cool-toned brunettes may prefer this muted version of the trend. Chunky highlights on brown hair in ash or taupe-inspired shades can add definition without too much warmth. If those cooler sections begin to shift brassy over time, using a toner may help bring the tone back into balance.
Metallic shades will always be a favorite of ours, and chunky copper highlights are a wearable take on the trend. Opt for a bright copper for a bold, striking look, or try a softer strawberry blonde hue for a subtler, very ‘90s feel. This style offers a gorgeous alternative to classic blonde tones while keeping all the high-contrast dimension that makes this technique so iconic.
Next Up: Why the Money Piece Hair Trend Is a Must-Try This Year
Photo courtesy of L’Oréal Paris

This site is intended for US consumers. Cookies and related technology are used for advertising. To learn more, or opt-out, visit AdChoices and our privacy policy.
Your Privacy Choices
 Notice at Collection