Teased Hair Is Your Secret To Long-Lasting Volume
Bombshell-worthy hair, right this way.




If you’re not a hairstylist, the phrase “teased hair” might call to mind fluffy ‘80s blowouts and updos that look poofy rather than polished. In reality, though, teasing your hair is one of the best (and easiest) ways to achieve long-lasting volume. However, a careful approach is key, as backcombing your hair can result in damage if done improperly. Ahead, we’ll explain what exactly it means to tease the hair and why it’s a technique worth learning. Then, we’ll reveal how to tease your hair for volume that lasts (and share a look at some of our favorite products to use). Keep reading for all of the details.
Teasing your hair—also known as backcombing or ratting hair—involves taking a small section of hair and gently combing it backward, from the ends to the roots. The technique is typically done on the underlying layers of hair, so the teased sections are hidden beneath smoother strands. This helps create natural-looking lift at the roots without a visibly rough texture or the need for heavy styling aids or hot tools.
Teasing is commonly used to enhance volume at the crown, give structure to updos, add body to ponytails, and help blend extensions. Depending on your technique, teasing can create anything from subtle texture and grip to dramatic, long-lasting height.


Before teasing your hair, you’ll need to gather the following tools and products:
Generally, it’s best to tease hair that hasn’t been freshly washed, as the natural oils from your scalp can help provide additional texture and grip. However, if you plan to lather up before styling, we recommend using a volumizing shampoo-and-conditioner duo to set your style up for success. Try the L’Oréal Paris Elvive Collagen Peptide + Lifter Volumizing Shampoo and the coordinating L’Oréal Paris Elvive Collagen Peptide + Lifter Volumizing Conditioner, which provide up to 72 hours of weightless volume to fine, flat hair.

Once you’ve gathered all of the essentials, you can get started on styling. Read along for a step-by-step breakdown explaining how to tease your hair like a pro.
Start by prepping your hair with a volumizing leave-in to add texture—this helps ensure that your hair holds once you backcomb it. If you’re starting with damp hair, the L’Oréal Paris Elvive Collagen Peptide + Lifter Big Lift Volumizing Mousse (pictured below) is an excellent pick. The lightweight formula is infused with 100% vegan collagen peptides and adds instant lift without a heavy or crunchy feel. For those starting with dry strands, we suggest misting your roots with a dry shampoo, such as the L’Oréal Paris Elvive Collagen Peptide + Lifter Big Fresh Volumizing Dry Shampoo. This step provides texture and grip while also helping to absorb excess oil for fresher-looking strands. Whichever you use, focus the product application on the root for targeted lift, and allow the formula to dry before proceeding to step two.

Next, section your hair to streamline the backcombing process. Clip away the topmost layer—you’ll use this later to cover the sections of teased hair. Then, divide the hair underneath into small, 1- to 2-inch sections, clipping the rest out of the way as you work.
Next, take a small section of hair (about 1 inch wide) and hold it with light tension. Place a fine-tooth comb or a teasing brush a few inches away from the roots, then use short, gentle strokes to comb the hair toward the scalp.
Take care to avoid back-and-forth “sawing” motions, which can cause unnecessary breakage. Instead, be patient and stick with short, controlled motions. As you work, the hair will build up at the base, creating a soft cushion that adds visible lift at the roots.
Once you’ve teased a section, gently move it forward and out of the way. Then, take a new section directly behind it and repeat the previous steps. Continue working in small sections, moving from front to back.
As you go, check your volume in the mirror rather than teasing every section the same amount—you can always build more lift where needed. Focus most of your teasing at the crown for a fuller, more modern look, and use a lighter hand around the hairline to keep the finish soft and natural. You can also vary how much you tease each section depending on your hairstyle, adding more density for updos and less for loose, everyday volume.
Once you’ve finished teasing your hair, gently lay it back into place, letting the unteased top layer fall over the backcombed sections. Using a fine-tooth comb, lightly smooth over the outer layer to refine the shape and conceal any visible teasing.
Use very light pressure to avoid tangling or brushing out the tease. The goal is to make the top layer look sleek and polished—not to flatten your volume.
From here, you can proceed as desired, pulling your hair into a voluminous updo or leaving it down for a bouncy, bombshell blowout. To help maintain your volume, we recommend lightly misting your finished style with hairspray (we recommend the L’Oréal Paris Elnett Satin Extra Strong Hold Hairspray). Focus the application on your roots, and avoid saturating your strands to help keep your look light and airy.
Teasing isn’t one-size-fits-all—where and how much you backcomb depends on the style you’re creating. A lighter hand can add soft, everyday lift, while more concentrated teasing delivers the structure needed for statement looks. Keep reading for tips on how to tweak your technique based on the style you’re after.
Focus teasing at the crown and just behind the hairline to create lift before securing your ponytail. This helps keep your ponytail from looking too flat and adds subtle volume where you need it most.
Concentrate teasing throughout the crown and mid-sections to build body and texture throughout your hair. This added structure helps styles hold their shape and appear fuller, which is especially helpful for voluminous or textured updos.
Target only the top and crown area, working in small sections to gradually build height. This technique is ideal for subtle, everyday volume that still looks natural and touchable.
Tease lightly at the crown and through the upper layers of hair to enhance body without disrupting the flow of your waves. The goal is to create soft lift and natural-looking movement rather than dense volume.
Teasing your hair isn’t inherently damaging, but it can lead to breakage if done too aggressively. Rough back-and-forth motions, over-teasing the same sections, or pulling through tangles can weaken the hair over time. It’s also important to avoid heavily teasing your hair every day, as frequent manipulation can make strands more prone to dryness and breakage.
How you detangle teased hair matters just as much. Instead of brushing out teased hair while it’s dry, apply a conditioner or detangling product and carefully work through knots from the ends upward to help prevent unnecessary pulling. You can also incorporate a reparative hair mask, such as the L’Oréal Paris Elvive Total Repair 5 Damage-Erasing Mask, into your weekly routine to help keep your hair looking and feeling its best.

Once you’re ready to rock a new hairstyle, you might be tempted to brush out the volume and call it a night. As tempting as that sounds, avoid the impulse. Brushing out teased hair while it’s dry can lead to split ends and unnecessary damage.
Instead, hop in the shower and saturate your hair, then apply a generous amount of conditioner to your roots and mid-lengths. This helps soften tangles and makes the teasing easier to undo. Using a wide-tooth comb, gently detangle your hair from the ends upward, working slowly to avoid pulling or snagging. Take your time—using too much force can weaken or snap your strands.
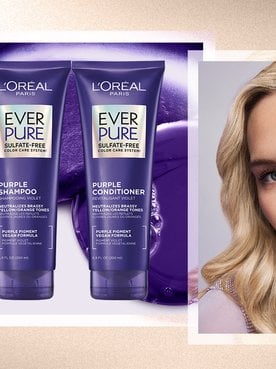
Once your hair is detangled, lather up and condition as usual with a reparative duo to help strengthen your tresses. We recommend the L’Oréal Paris EverPure Sulfate-Free Bond Repair+ Shampoo and L’Oréal Paris EverPure Sulfate-Free Bond Repair+ Conditioner, which work together to help reinforce weakened hair bonds from the inside out. For extra TLC, you can also pre-treat your mane with the L’Oréal Paris EverPure Sulfate-Free Bond Repair+ Pre-Shampoo Treatment, which helps visibly reverse damage in one use.
After showering, squeeze your strands to remove excess moisture, apply a hydrating leave-in treatment, and let your hair air-dry. Treating your mane gently between styling sessions helps ensure your hair looks and feels its best—no matter how you wear it.

Next Up: Bad Hair Day? Try These Quick Fixes
Photo courtesy of L’Oréal Paris

This site is intended for US consumers. Cookies and related technology are used for advertising. To learn more, or opt-out, visit AdChoices and our privacy policy.
Your Privacy Choices
 Notice at Collection