
How To Do a Messy Bun on Every Hair Type and Texture
Messy never looked so good.
The messy bun is a simple hairstyle, ideal for late mornings, lazy weekends, and any time you just don’t feel like breaking out the hot tools. But simple doesn’t necessarily mean effortless. To nail this low-key look, you have to strike the perfect balance between artfully tousled and neatly put-together—and that can sometimes be easier said than done. Luckily, we’re here to help.
Ahead, we’re sharing an easy four-step messy bun tutorial to get you started, plus tips on how to do a messy bun that complements different hair types, lengths, and textures. Find it all, plus a look at the products you’ll need to nail the model-off-duty look, below.
Before we dive into the specifics of styling a messy bun on different hair types, we thought it’d be useful to share an easy messy bun tutorial to start with. Grab some dry shampoo and two hair ties, then follow the four steps below.
The best messy bun comes from not-quite-clean strands—second or third-day hair is ideal for a tousled, textured look. If your roots are oilier than you’d like, spritz them with a bit of dry shampoo. We recommend opting for one that helps volumize, as this will help create body for your messy bun look. Just be sure to thoroughly brush the dry shampoo throughout your hair before moving on to the next step—some formulas can leave a slight white cast on your hair if not worked in fully.
Next, gather your hair loosely at the back of your head and secure it with a hair tie (if you’d prefer a high messy bun, create the pony at the crown of your head instead). We suggest using a thinner hair tie for this step, as you don’t want the pony to be too tight.
Hold the end of your ponytail and twist it around itself to create a coiled shape. Then, wrap the coil around the base of your ponytail to create your bun, and secure it in place with another hair tie or a scrunchie.
At this point, your updo may appear more polished than messy—but that’s an easy fix. Gently loosen the bun with your fingers and pull out strands around your face to lean into that messy, lived-in look. If your hair is textured, coily, or curly, feel free to fully embrace those wispy baby hairs. Adjust the look until you get the level of (artfully) messy you’re after.
Fine, straight hair can have a hard time holding on to texture—which can make nailing your messy bun a bit tricky. That’s where styling products, like texturizing pastes, come into play. Keep reading to learn how to make a messy bun last on sleek, straight strands.
Start by gently brushing your hair until it’s smooth and free of knots or tangles. Since the aim is a messy bun with tousled hair and imperfect styling, add some texture and volume to your strands before starting on your updo. We recommend prepping your strands with a thickening texturizing paste, such as L’Oréal Paris Studio Line Overworked Hair Putty. Work a small amount throughout your roots before gathering your hair into a ponytail as outlined above.

Teasing is a styling technique that involves back-combing the hair to create small tangles that give the hair a thicker, fuller appearance—and it’s a great way to give your messy topknot a bit more oomph. If you need a rundown on how to tease your hair, we break it all down here.
To keep your messy bun in place throughout the day, spritz your strands with the L’Oréal Paris Advanced Hairstyle LOCK IT Weather Control Hairspray. This lightweight hairspray provides up to 48 hours of hold while helping to shield the strands from humidity (and the frizz that can accompany it).
Along with a light coating of hairspray, you can lay down your edges to complete the look. Use a small edge brush and apply a dime-size amount of the L'Oréal Paris Studio Line Mega Gel to your baby hairs to keep them in place.


Those with shorter strands may not have the length needed for a true messy bun, but that doesn’t mean you can’t embrace a similar style. Here are a few tips for making the look work for your mane.
If your hair isn’t quite long enough to gather into a single pony, consider creating a half-up messy bun. Start by dividing your hair into two sections, one on top of the other. Then, following the steps outlined above, create a messy bun only using the top section of hair. You’ll get the messy bun essence—but in a way that works for your length.
Hair ties and elastics can sometimes be too bulky for those with shorter strands. To avoid this common concern, consider securing your topknot with bobby pins rather than hair ties. Just be sure to reach for pins that match your natural hair color—this will help ensure the focus is on your bun and not on the pins holding it up.
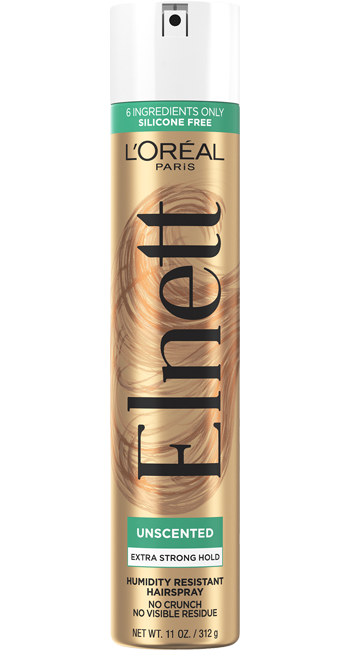
If your hair needs help to stay in place, mist the topknot with L’Oréal Paris Elnett Satin Extra Strong Hold Hairspray. The humidity-resistant formula offers brushable hold and helps lock styles into place without any stickiness, stiffness, or visible residue.
Curly hair has texture built-in, so achieving a messy curly bun is generally pretty. Still, there are some things to keep in mind before you tie up your ringlets. Ahead, learn how to make a cute messy bun that puts your natural texture on full display.
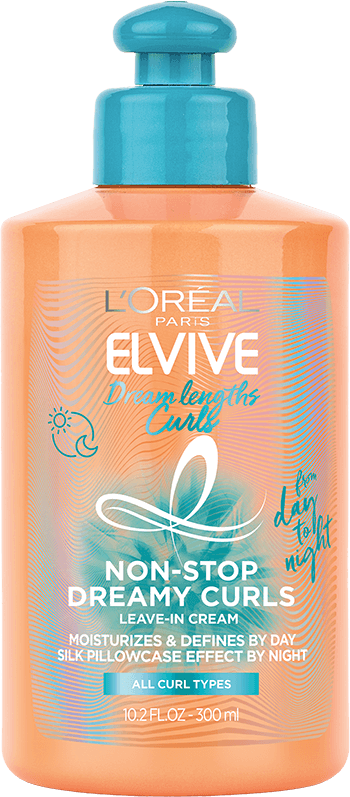
Hydration is the key to bouncy, healthy-looking curls. Before pulling your hair into a topknot, prep your tresses with L’Oréal Paris Elvive Dream Lengths Curls Leave-In Conditioner. The hyaluronic acid-infused formula helps define and shape curls without weighing them down—and it can be applied on wet or dry hair (so you don’t have to push up wash day to use it).
While a messy bun should be a bit messy (as the name suggests), it shouldn’t look frizzy or disheveled. If you find yourself facing frizz after pulling your tresses into a curly top knot, smooth down those unruly hairs with a strong-hold hair gel and an edge brush.
Pull out a few face-framing spirals to add movement to your messy bun look. If needed, use a bit of the aforementioned leave-in conditioner to reshape your ringlets and give them all-day definition.
Super thick, voluminous hair lends itself well to a messy bun—but you may need to take steps to ensure the style holds without falling flat. Here are a few messy bun tips to keep in mind next time you’re crafting your undone updo.
If you’re working with a ton of hair, following the standard messy bun tutorial outlined above may prove challenging. Instead, try creating a variation on the messy bun by gathering your hair into a ponytail then creating a looped bun, leaving a few inches out at the ends. Then, wrap the loose ends around your hair tie and secure them with bobby pins for an effortless look that won’t have you struggling to loop your weighty strands around a hair tie.
Oftentimes with thick hair, hair ties can break or sag in traditional messy bun hairstyles since there’s so much hair to hold. To forestall this problem, consider using a coiled plastic hair tie rather than a traditional elastic. These are thicker and more durable than standard hair ties, making them ideal for those with thick or extra-long hair.
Thick hair may require a stronger hold hairspray to ensure your look stays in place all day, so mist your messy bun with L’Oreal Paris Elnett Satin Extra Strong Hold Hair Spray for lasting, crunch-free hold.
Next Up: 8 Easy and Chic Slicked-Back Hairstyles to Try
Photo Courtesy of L'Oréal Paris
This site is intended for US consumers. Cookies and related technology are used for advertising. To learn more, or opt-out, visit AdChoices and our privacy policy.
Your Privacy Choices


