
Where to Put Concealer to Brighten, Lift, and Perfect Your Look
Get all the info you need to apply it like a pro.
Concealer is truly a game-changer in the world of beauty. This versatile product has stood the test of time, earning a permanent spot in makeup bags across the world, even among those who only dabble in makeup. Concealer works wonders, covering pesky pimples, camouflaging under-eye circles, evening out skin tone, and temporarily masking a variety of blemishes. While embracing our natural beauty is important, there are times when we might prefer to keep these imperfections under wraps.
To unlock the full potential of this beauty hero, it's essential to understand where to put concealer and how to apply concealer effectively. With the right techniques, you can elevate your beauty routine to new heights. Consider this your ultimate guide to mastering concealer application, complete with insights into the most buzzworthy products that TikTok beauty enthusiasts rave about.
Concealer is a must-have in any beauty arsenal, known for its thicker consistency and superior coverage compared to foundation. This powerful product is specifically designed to target and camouflage imperfections with precision. From hiding dark circles under the eyes to concealing blemishes, redness, and discoloration, concealer works its magic to create a flawless canvas.
But its versatility doesn't stop there. Concealer can also be a secret weapon for brightening your complexion and adding dimension through contouring. By strategically applying it to high points of the face, such as the cheekbones, bridge of the nose, and center of the forehead, you can create a radiant, lifted look.
Whether you're a beauty novice or a seasoned pro, understanding how to use concealer for these purposes can transform your makeup routine and enhance your natural beauty.
Everyone has their unique way of using concealer, making it a staple in countless beauty routines and the star of many trending makeup moments. The beauty of it lies in its versatility, allowing you to personalize its application to suit your needs. However, to truly unlock its potential, consider exploring new techniques on how to apply concealer. Whether you're curious about how to put on concealer or looking for expert advice on how to apply under-eye concealer, we're here to share some invaluable tips.
Let's face it—concealer truly shines when it comes to hiding blemishes. For those pesky pink or reddish spots you’d rather keep under wraps, reach for a green concealer. Don't worry about looking like a fairy tale villain; this color-correcting marvel neutralizes the redness, creating the perfect base for your skin-toned concealer. It's all about the color wheel: green opposes red, making green concealer your go-to for warm-toned blemishes.
If you have a deeper complexion, breakouts might appear as darker marks. In this case, a red or orange concealer can effectively counteract these hues. Apply it before your usual concealer to achieve a smooth, even finish that keeps imperfections at bay.
Expert Tip: Use a clean concealer brush to apply the product over any blemishes. This technique is preferable to applying directly from the wand, as it prevents transferring breakout-causing bacteria back into the product.
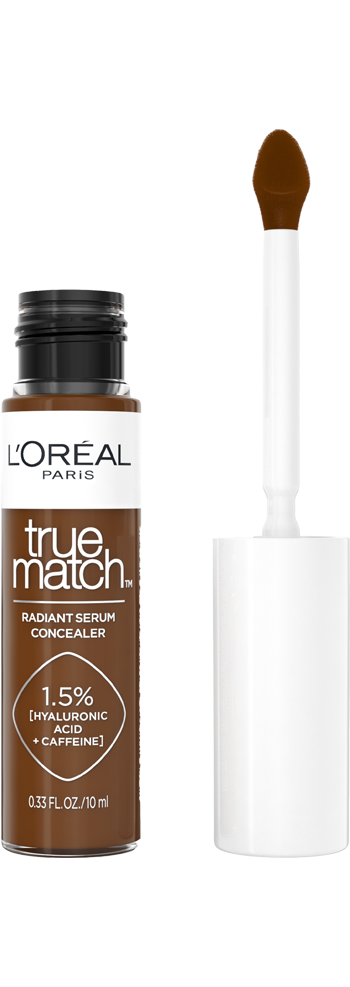
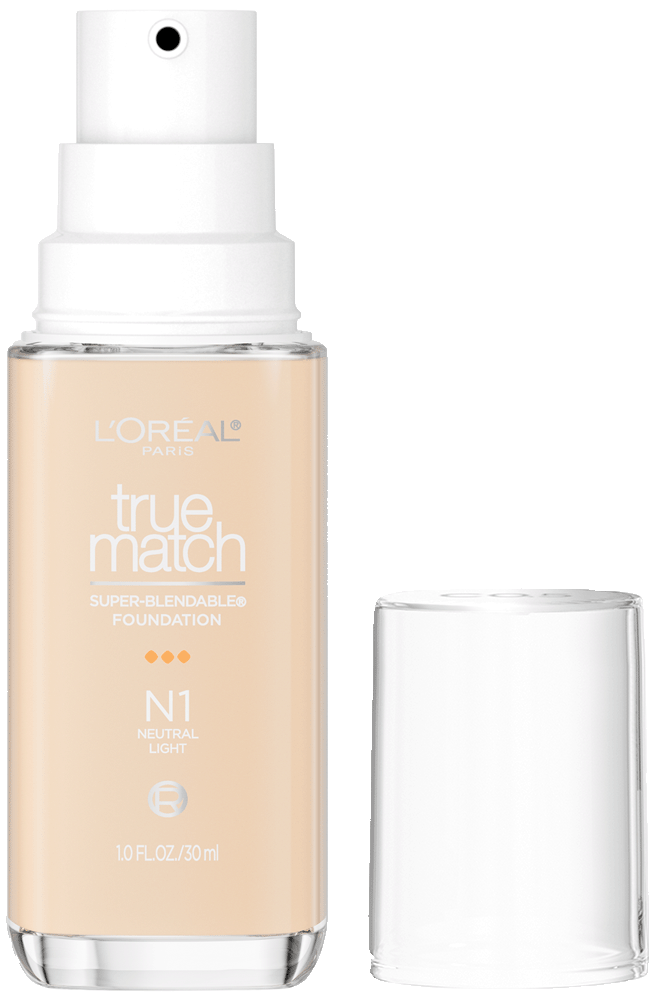
Let's face it—concealer truly shines when it comes to hiding blemishes. For those pesky pink or reddish spots you’d rather keep under wraps, reach for the L'Oréal Paris True Match Radiant Serum Concealer. This innovative concealer is infused with hyaluronic acid and caffeine, offering medium coverage that not only masks imperfections but also hydrates the skin like a serum. Available in 24 skin-like shades, it matches seamlessly with the True Match Super-Blendable Foundationand serum, allowing you to create a cohesive and natural look.
Expert Tip: Use a clean concealer brush to apply the product over any blemishes. This technique is preferable to applying directly from the wand, as it prevents transferring breakout-causing bacteria back into the product.

If you notice your complexion looks a little on the lackluster side, we’ve got one piece of advice for you: conceal, conceal, conceal. Brighten things up and give your face a glowy look with a concealer that is one to two shades lighter than your skin tone, and apply it to key spots on the face. Try the L'Oréal Paris Infallible Full Wear Concealer Up To 24H Full Coverage, it’s waterproof formula won't transfer, fade, or crease, so your full coverage look is locked in all day. The creamy texture is non-greasy and easy to apply, so a little goes a long way.. For an illuminating look apply a lighter concealer on the same spots that you would apply highlighter: down the bridge of your nose, above your cheekbones, on the center of your forehead, and in the middle of your chin.

Use concealer to enhance your natural brows without the over-plucking and tweezing of eyebrow hairs. Simply swipe brows with the L’Oréal Paris Infallible Volumizing 24H Wear Brow Mascara, making sure to form the hairs in the direction you want them to lie with the 3D grip brush. Then, using a small brush or the tips of your clean pinkie finger, dip into your concealer and use it to outline the natural arch of your eyebrows around the top and bottom. Make sure to blend it out until it’s even, so you don’t end up with blocky brows.

If lipstick bleeding and smudging are practically the bane of your existence, we have news you’ll be happy to hear: Concealer can (yet again) save the day. All you need is a like L’Oréal Paris True Match Radiant Serum Concealer with an iron shape applicator and pointed tip for ultra-precise application to get the job done. Pick up a little product with an angled lip brush and go carefully around the natural line of your lips to clean up your pout. Best of all, this hack highlights and creates the illusion of fuller lips.
While you don’t want to apply concealer all over your face, you can use it in place of foundation, but only in small quantities. It might seem logical that the more concealer makeup you apply, the more you’re able to cover up imperfections, but that’s not the reality of how concealer works. When you load on too much product, you’ll end up drawing attention to the spots you were trying to hide and risk a cakey, creased texture. Instead, apply a thin layer of concealer on the desired area to start. You can always add more if necessary.
Now there is a solution that can solve both things, theL'Oréal Paris Infallible Skin Ink 2-In-1 Foundation Concealer. Skin Ink evens like a foundation and covers like a concealer for the ultimate hybrid. It has a self-setting, soft matte finish that doesn't cake and doesn't crease.
It’s formula resists transfer for up to 48 hours while feeling undetectable on skin. Oh, and it’s waterproof, sweatproof, and humidity proof.


We talk a lot about how there are no rules in makeup, and this is another case where that rings true. With that being said, there is a preferred method for makeup application to get a crease-free and smooth texture. For a more natural finish, apply foundation before concealer. When you apply foundation first, you’re creating a more even base for concealer, bronzer, blush, and any other makeup products you want to put on top. The only time you’ll want to put concealer before foundation is when you’re color-correcting blemishes.
Natural makeup look usually equates to an even skin tone with subtle highlighting to emphasize your natural beauty for that “no-makeup makeup look.” The best way to get a natural makeup look is to take care of your skin with a hydrating skin care routine, and on the days your dark under-eye circles or dark spots are too prominent, reach for eye concealer makeup and get to work.
If you want to hide dark under-eye circles, start off with a peach color-correcting concealer. The pale color can help counteract the bluish look of dark circles since the colors are opposite each other on the color wheel. As for where to apply under-eye concealer, draw a half moon under the eye — the flat point following the natural curve of the skin there — before creating an elongated tail that creates a lifted illusion to draw attention to the eye. Blend with a makeup sponge or the pads of your clean fingers so the concealer can melt into the skin. Follow up with a concealer that matches your skin tone. That is why we love the L’Oréal Paris True Match Radiant Serum Concealer, which bridges the gap between skin care and makeup with its hydrating formula that reduces under-eye puffiness while providing instant dark circle coverage.
Primer is a makeup product used to help create a smooth, even base for your makeup as well as help keep it in place. If you find yourself at the end of your tube of primer, use concealer to serve as the perfect stand-in. If you have an oily face, make sure you use a formula that is matte to keep your lip corner, cheek and eyelid makeup from creasing and sliding.. Dab a tiny amount of concealer to each part before gently buffing it in to create an even layer. If you are doing your eyes follow up with a white eyeshadow or a translucent setting powder to avoid excessive creasing. Trust us, this little beauty hack will be especially useful during warmer summer days or when you know you’ll be running around a lot (and sweating).
Thanks to concealer, sculpted cheekbones are perfectly accessible to everyone. You can carve out your cheekbones by contouring with a concealer that’s one to two shades darker than your skin tone. To contour your face, grab a full-coverage concealer like theL'Oréal Paris Infallible Full Wear Concealer Up To 24H Full Coverage in your desired shade. Apply stripes of it down the sides of your nose, below your cheekbones, on your temples, and along your jawline, then blend it out with a makeup sponge. You’ll be left with a more sculpted face with defined, chiseled features.
Choosing the right concealer shade can make all the difference in achieving a flawless look. When selecting a concealer for the under-eye area, opt for a shade that's one step lighter than your natural skin tone. This approach brightens and revitalizes tired eyes, effectively masking dark circles. For blemishes, match your concealer to your skin tone as closely as possible to ensure seamless coverage that blends effortlessly into your complexion.
If you're looking to contour, choose one that is 1–2 shades darker than your skin tone. This technique defines and adds dimension to your features, enhancing your natural beauty. For color correction, specific shades come into play: reach for peach or orange concealers to combat blue or purple tones, and green concealers to neutralize redness. With these tips in mind, you can confidently navigate the world of concealers and select the perfect shade for every need.
Next Up:What Is a Foundation-Concealer Hybrid and How Do You Use It?
Photos courtesy of L’Oréal Paris
This site is intended for US consumers. Cookies and related technology are used for advertising. To learn more, or opt-out, visit AdChoices and our privacy policy.
Your Privacy Choices


