Eyeshadow has the power to enhance your overall beauty look and it’s a makeup tool we simply cannot live without. From neutrals to bold and rich hues, eyeshadows allow you to create all kinds of fun makeup looks. And the cut crease eyeshadow look is definitely one to try when looking to create a glam look with dimension. However, if you have hooded eyes, you may already know how challenging it can to create a cut crease. Between having minimal crease space to work with and dealing with frequent makeup transfer, trying to carve out your lid on a hooded eye can feel like a frustrating task. Fortunately, there are a few techniques you can use to make the process easier. Ahead, we’re sharing four cut crease eyeshadow tips to help you get the best results.
Tip #1: Use An Eyeshadow Primer To Prep Your Lids
We know that one of the most popular eye makeup hacks involves using concealer as an eyeshadow base in lieu of an eyeshadow primer. However, when it comes to creating a sharp and defined cut crease on hooded lids it’s better to opt for an eyeshadow primer that’s cream-based and formulated with a thick and tacky texture. This will give the eyeshadow a surface to cling to and help prevent any transfer, which is necessary for those with minimal crease space. An eyeshadow primer will also work in your favor to keep creasing and natural oils at bay. Not to mention, this eye makeup staple makes it easy to blend out multiple eyeshadow shades.
Editor’s Note: When applying an eyeshadow primer, place the product directly onto your eyelids. Then use a damp makeup blender to gently pat the primer across the entire eye area including the lids, crease, and brow bone.
Tip #2: Use A Round Spoon To Create A Faux Crease
The major difference between hooded eyes and other eye shapes is the crease space. With hooded eyes, there is minimal space to work with so you’ll have to create the appearance of a larger crease—which can be tricky. Luckily we have just the tip to help. Grab a clean round spoon and place it over your eye socket, then use a fluffy eyeshadow brush dipped into a shadow and follow the shape of the spoon’s edge to sweep on the color. When you remove the spoon, you’ll see a perfectly rounded crease shape above your natural crease.
Editor’s Note: To create a natural-looking crease use neutral shades like the L’Oréal Paris Colour Riche Monos Eyeshadow in Pain Au Chocolat or Cafe Au Lait.
Tip #3: Apply Concealer Like Eyeliner And Look Up
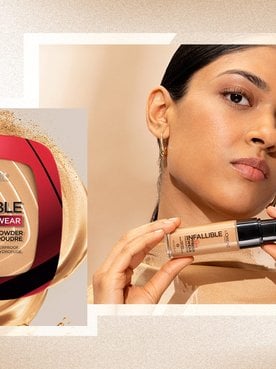
This is where your full-coverage concealer comes in. Instead of used as a primer, a heavy-duty concealer will clean up the lid and help create a sharp contrast between the light and dark eyeshadow shades, making the eyes appear larger. Grab a small flat eyeshadow brush and dab it into some concealer, like the L’Oréal Paris Infallible Full Wear Concealer Waterproof, Full Coverage. Instead of following the line under your new crease, apply the concealer directly across your eyelid using the same motion as you would when applying eyeliner. Then tilt your head down and look up with your eyes towards the sky for a few seconds. When you look into the mirror, you’ll notice a bit of the concealer transferred near the new crease, creating the perfect spot for you to start carving out and filling in your cut crease with concealer.
Tip #4: Apply The Concealer Using Patting Motions
To get a defined cut crease effect, make sure to use a flat eyeshadow brush and gently pat the concealer onto your lid. We recommend not using a makeup blender because you want to have more control over where the concealer gets blended. Make sure to follow the shape of your new crease and fill in the desired eye space. Do not extend the concealer onto the crease you created because you want both colors to have a contrast and not blend in, helping to create the illusion of a sharp cut crease. You can also give yourself a more wide-eyed appearance by patting the concealer into and over the inner corners of the eyes.
Photo Credit: Titilay Oabiwon, @titilayoabiwon


