While many say mascara is the finishing touch to any eye look, gel eyeliner can be just as transformative. Whether you’re after a sharp, graphic wing or a soft, smoky definition, eyeliner can take your makeup from day to night in minutes. With so many formulas out there, from pencil to liquid to gel, it’s easy to overlook one of the most versatile and beginner-friendly options: gel liner.
If gel eyeliner isn’t already in your makeup kit, it’s time to change that. This multitasking product can work for almost any eye makeup style, from natural definition to bold statement looks. Keep reading to discover what makes gel eyeliner so versatile, how to apply it like a pro, and the best gel eyeliners to try.
3 Benefits of Using Gel Eyeliner
We mentioned that gel eyeliner is one of the easiest formulas to use, but it’s also one of the most adaptable. Here’s why it deserves a permanent spot in your routine.
It Can Make Your Eyes Appear Bigger
If you want to emphasize your eye shape and create the illusion of bigger eyes, gel eyeliner is a great choice. Its blendable, jelly-like texture makes it easy to apply along the upper and lower lash lines for a defined yet natural look. The soft finish can enhance your eyes without looking harsh.
For extra-big eyes, pair your look with a lengthening mascara like L’Oréal Paris Telescopic Original Mascara, which delivers up to 60% longer lashes and precise lash-by-lash separation.

It’s Easy to Apply
For eyeliner beginners, gel liner is a game-changer. Its buttery texture glides without dragging or skipping, making it forgiving to work with. Whether you’re drawing a simple line or experimenting with a more complex shape, gel eyeliner offers smooth, even application.
It Can Be Used for Many Different Looks
From a precise wing to a smudged-out smoky effect, gel eyeliner can do it all. You can use it to line your waterline, create a dramatic cat eye, or even blend it out for a soft-focus finish. Unlike liquid formulas, it’s easy to smudge and layer, making it a true multi-use tool.
The Best Gel Eyeliner
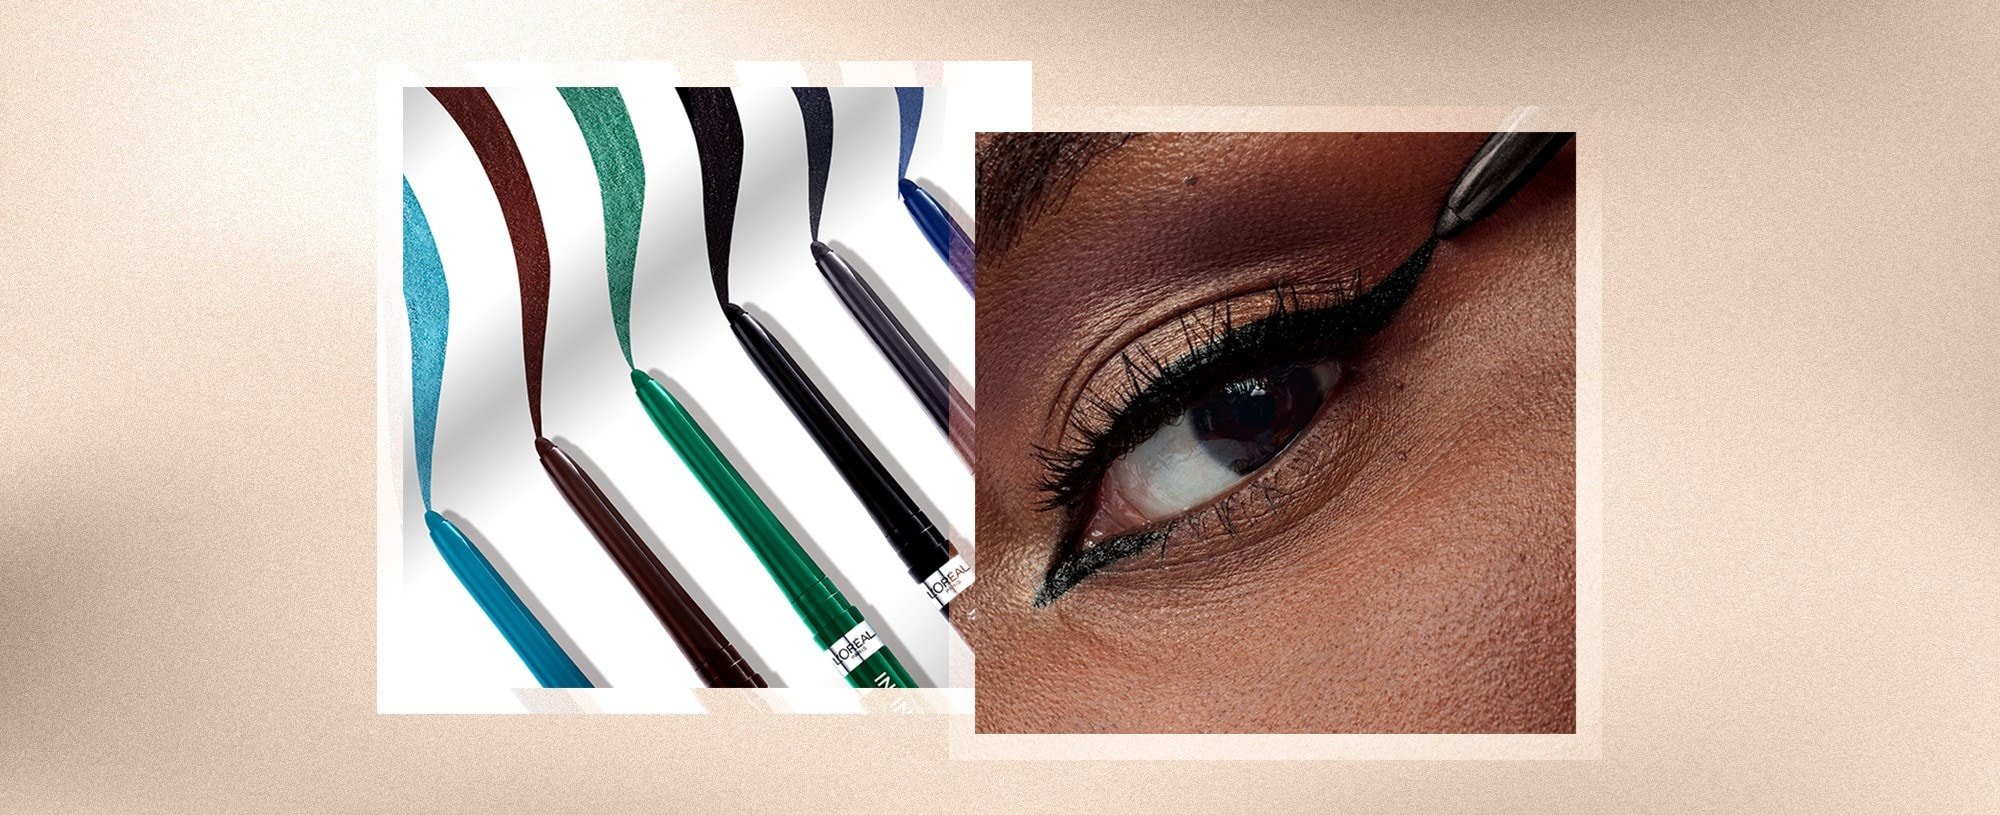
Before diving into techniques, start with a high-performance formula that will deliver on both color payoff and wear. The L’Oréal Paris Infallible Grip Mechanical Gel Eyeliner is a creamy gel eyeliner that offers intense pigment in six versatile shades, from classic black to bold emerald green. It’s waterproof, transfer-proof, smudge-resistant, and lasts up to 36 hours (perfect for long days or nights out). Plus, it comes with a built-in smudger, so you can switch from sharp definition to smoky drama in seconds.
How to Apply Gel Eyeliner
If you're wondering how to apply gel eyeliner, follow these four simple steps for flawless results.
Step 1. Prime Your Eyes
Before applying gel liner, prep your lids with an eyeshadow primer or finish your eyeshadow look first. Eyeliner is typically one of the final steps, helping to pull the look together. Apply your eyeliner right before mascara for the best effect.
Step 2. Choose Your Shade
Opt for softer tones like brown or gray for a subtle, everyday look, or go bold with emerald green or turquoise for a pop of color. The L’Oréal Paris Infallible Grip Mechanical Gel Eyeliner has options for every mood and occasion.

Step 3. Line Your Lash Line
Glide your liner from the inner to outer corner along the upper and/or lower lash line. For a wing, angle your wrist upward at the outer corner and flick at about 45 degrees. If you’re using a brush, keep your grip light for smooth, controlled strokes.
Step 4. Gently Smudge
If you're looking for a smoky finish, smudge immediately after application because once the formula sets, it won’t budge. Use the built-in smudger or a clean brush to soften edges or flick the outer corner for a diffused wing.
What Can I Use to Apply Gel Eyeliner?
If your gel eyeliner comes in a pot rather than a pencil, a clean, angled makeup brush works best for creating precise lines and defined shapes. Angled or pointed brushes are ideal for wings, sharp flicks, and graphic designs, while dense eyeshadow brushes are better for blending and creating smoky effects along the lash line or outer corners. For the most control, hold your brush close to the ferrule and use short, light strokes to build the intensity gradually.
Do You Wet the Brush Before Applying Gel Eyeliner?
You can lightly dampen your brush with water or a few spritzes of setting spray to help the gel eyeliner glide on more smoothly, especially with pot formulas that have a thicker consistency. A slightly damp brush can improve control and prevent tugging on the skin, resulting in cleaner lines. Always check the product instructions first, as adding moisture can sometimes dilute the pigment, alter the finish, or shorten wear time.
Can Gel Eyeliner Be Smudged?
Yes, but timing is key, and it makes all the difference in the final look. Most gel liners can only be smudged immediately after application, while the formula is still soft and workable. Once they set, especially with long-wear options, they lock into place with a smudge-proof finish that lasts all day, so you’ll need to work quickly if you want a blended or smoky effect.
Gel Versus Liquid Eyeliner
Gel eyeliner is perfect for smoky looks and for those who prefer a softer finish or a bit of flexibility in their lines, making it a great option for both beginners and seasoned makeup lovers. Its creamy texture allows for easy blending, so you can correct small mistakes without having to start over. Liquid eyeliner, like theL’Oréal Paris Infallible Grip Mechanical Gel Eyeliner, excels at creating ultra-sharp, defined lines and bold wings, but it demands a steadier hand, more precision, and is less forgiving of errors.

Pro Tips & Tricks for Flawless Gel Liner Looks
Even with an easy-to-use product like gel eyeliner, the right techniques can take your look to the next level.
Tip #1: Use Eyeshadow to Soften the Line
For a softer, more blended effect, layer a matching eyeshadow over your gel liner to diffuse any harsh edges and create a seamless transition into your eyeshadow. This technique can make bold liner looks more wearable for daytime and add depth to smoky styles. A creamy stick shadow, like L'Oréal Paris Paradise Le Shadow Stick, works beautifully to smudge, blend, and blur edges, giving you control over how soft or dramatic the final look appears.
Tip #2: Freeze Your Brush for Extra Precision
If your gel eyeliner feels too creamy and is difficult to control, place it in the fridge for a few minutes before applying to firm up the texture slightly. A cooler, firmer product will grip the skin better, allowing for steadier application and sharper edges. This trick is especially helpful for creating clean lines, detailed shapes, or intricate designs that require maximum control.
Tip #3: Layer with Pencil or Liquid for Impact
Combine gel eyeliner with a pencil or liquid formula to add depth, dimension, and extra staying power. Start by lining with gel liner to create a smooth, blendable base, then layer a sharpened pencil for softness or a liquid liner like L'Oréal Paris Infallible Grip Precision Felt Waterproof Eyeliner for a crisp, high-impact finish. This layering technique not only boosts color intensity but also helps your eyeliner look last longer without fading.
Tip #4: Don’t Forget to Tightline
For a fuller lash look, apply gel liner along your upper waterline before mascara, a technique known as tightlining. This helps fill in any gaps between lashes, making them appear thicker from root to tip and adding subtle definition without a visible line on the lid.
Next Up:Eyeliner Hacks That Will Change the Way You Do Your Makeup
Photo courtesy of L’Oréal Paris
Photo credit: IG/@ilsesaenzmakeup, @beauty_studio_carica


