Our Best Eyebrow Pencils for the Most Perfect Arches
Shape, fill, and set your brows with the right products
DISCOVER OUR NEW ARRIVALS. SHOP NOW

A well-shaped brow can transform your whole face, and the right eyebrow pencil makes it easy to create definition that lasts. Brows have moved away from thin, over-tweezed arches toward fuller, softly filled-in shapes that look polished but still natural. Read on to learn how to choose the right eyebrow pencil, apply it step by step, and keep your brows looking softly defined all day.
When you are choosing the best brow pencil waterproof formula for your routine, think about the level of definition you like and how much time you want to spend on your brows each day. The two options below give you different tips and textures, so you can match your eyebrow pencil to your comfort level and desired finish.
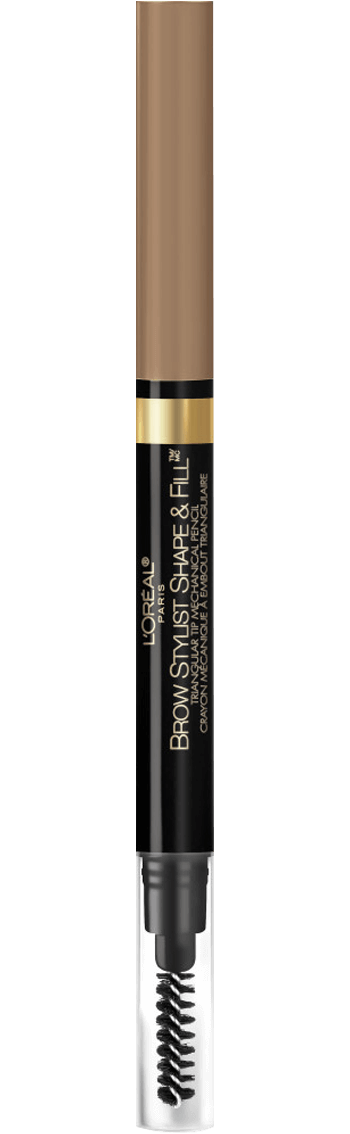
This eyebrow pencil has an ultra-fine 0.5mm tip that mimics tiny brow hairs and makes it easy to fill in sparse areas with precision. The waterproof formula glides on smoothly, blends easily, and is ophthalmologist-tested, so it works for sensitive eyes and contact lens wearers. With a built-in spoolie, this brow pencil with a brush can soften harsh lines and shape your arches without grabbing an extra tool. If you want a waterproof eyebrow pencil you can rely on daily, this one is a flexible staple.

This is a great pick if you like fuller-looking brows with soft edges. The angled, triangular tip makes it simple to sketch in the outline of your arch and quickly shade the center of the brow. A built-in spoolie lets you blend for a softly diffused finish that resembles the effect of using an eyebrow pencil and powdertogether. This is a smart option when you want to fill in both the body and tails of the brows in just a few strokes.

.png)
These simple steps work whether you are just starting with an eyebrow pencil or refining a routine you already love.
Start with a clean canvas, so the product adheres evenly. Use micellar water or your regular cleanser to remove makeup, skincare residue, and excess oil from around the brows, then pat the skin dry. Try the L'Oréal Paris RevitaLift Radiant Smoothing Cream Cleanser to gently remove impurities before you start on your brows.
Use a spoolie or eyebrow brush with a comb to sweep your brows into the direction you want them to sit. For a lifted look, brush hairs upward and slightly outward. For a softer, straighter brow, follow the natural growth pattern before applying any product.
Use the tip of your eyebrow pencil to lightly trace the bottom edge of your brow from the inner corner toward the tail. Then sketch a softer line along the top of the brow, focusing on defining the arch and tail without creating a harsh block of color. Keep your strokes light so they blend easily later.
Next, fill in any sparse areas using short, feathered strokes that mimic natural hairs. Concentrate the most color at the arch and tail, keeping the front of the brow a bit lighter for a softer effect. Build up slowly until you reach your desired intensity. The L'Oréal Paris Faux Brow Hair-Like Brow Filling Pen is especially helpful to add extra hair-like detail in the sparsest spots, delivering natural, fuller-looking brows.

Finish by combing through the brows with a spoolie, blending the pencil strokes, and softening any visible lines. Brush in the same direction you shaped the hairs earlier so the color diffuses without losing the structure you created.
Using a long-wear eyebrow pencil is a strong start, but a couple of extra steps can help your arches last even longer. Add these finishing touches when you want your brow look to stay fresh through long days, events, or humid weather.
Once your brows are filled in, a brow gel or brow mascara helps keep each hair in place. Swipe onL'Oréal Paris Infallible Volumizing 24H Wear Brow Mascara using short, upward strokes to add soft volume and flexible hold. The fiber-infused formula creates the look of fuller brows in just a few passes and layers well over your favorite eyebrow pencil. Another option isL'Oréal Paris Infallible Up To 24HR Brow Lamination, which lifts and sets the hairs for a sleek, laminated effect that lasts.


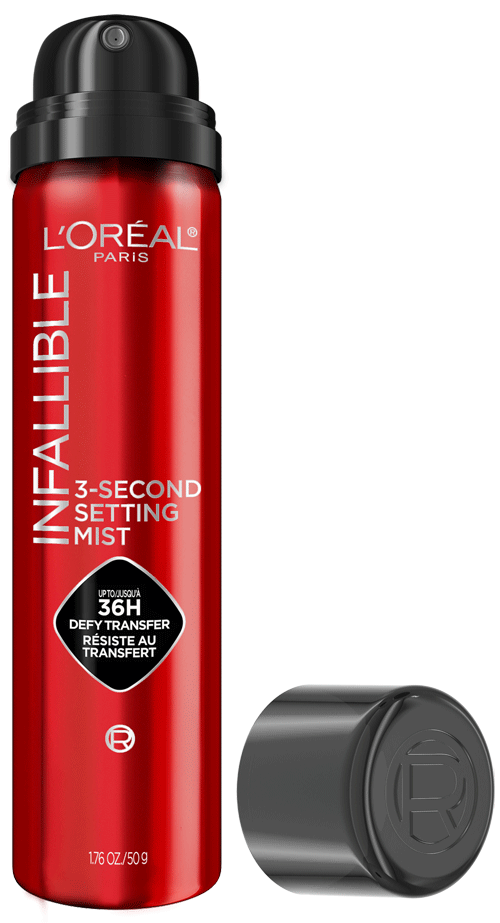
Your complexion products can affect how long your brow makeup lasts, especially around the edges of your eyebrows. Once you have finished your makeup, mistL'Oréal Paris Infallible 3-Second Setting Mist onto your face to help lock everything in place, including your brows. Setting sprays like this create a lightweight veil over water-resistant eyebrow makeup, which can help minimize fading from sweat, humidity, or natural oil.

Shade is just as important as formula when you are choosing an eyebrow pencil. Look at your hair and brow undertones: if they lean warm (golden or copper), a warm or neutral brow shade will look most natural, while cool ash tones pair better with cool brow colors. If you are unsure, choose a neutral shade close to your natural brow color and build slowly.
A simple guideline for deciding whether brows should be lighter or darker is to go one to two shades deeper than very light hair and one to two shades lighter than very dark hair. Blondes and those with balayage often look best with a soft taupe or light brown brow shade that adds definition without overpowering the hair. Brunettes can choose medium to deep brown tones, while natural redheads tend to suit warm auburn or brownish-red hues. If you have gray, silver, or white hair, try a cool taupe or soft gray-brown eyebrow pencil for a gentle frame that does not look too harsh.
Even when you have found your go-to eyebrow pencil, a few small habits can keep your brows from looking as soft and balanced as you would like. Here are the most common brow mistakes and simple tweaks that will make your arches look more polished and natural.
Packing on too much color can make brows look heavy or blocky. Instead of filling in the entire brow with solid lines, use light, hair-like strokes and focus more pigment on the arch and tail. Then blend with your spoolie until the color looks diffused and natural.
Crisp, unblended lines at the top and bottom of the brow can draw attention away from your eyes. Soften them by brushing through with a spoolie after you outline, or by lightly tapping along the edges with a fingertip to blur. The goal is a clean shape that still looks like brow hair, not a marker line.
Most brows are naturally sisters, not twins, but dramatic differences in height or shape can be distracting. Use short strokes of your eyebrow pencil to build up sparse areas on the lower arch of one brow rather than over-tweezing the fuller one. Step back and check your face in the mirror as you go so you can keep both sides balanced.
For many people, the tail is the first area to thin out. If you have sparse eyebrows or patchy tails, pair a precise eyebrow pencil with the L'Oréal Paris Faux Brow Hair-Like Brow Filling Pen to create fine, hair-like strokes that extend and define the outer ends.
Next Up: Laminated Eyebrows: The Secret To Effortless, Sculpted Brows
Photo courtesy of L’Oréal Paris
This site is intended for US consumers. Cookies and related technology are used for advertising. To learn more, or opt-out, visit AdChoices and our privacy policy.
Your Privacy Choices
.png?w=60&hash=544746BE4D33C19DEAAA75AC969010B0)


