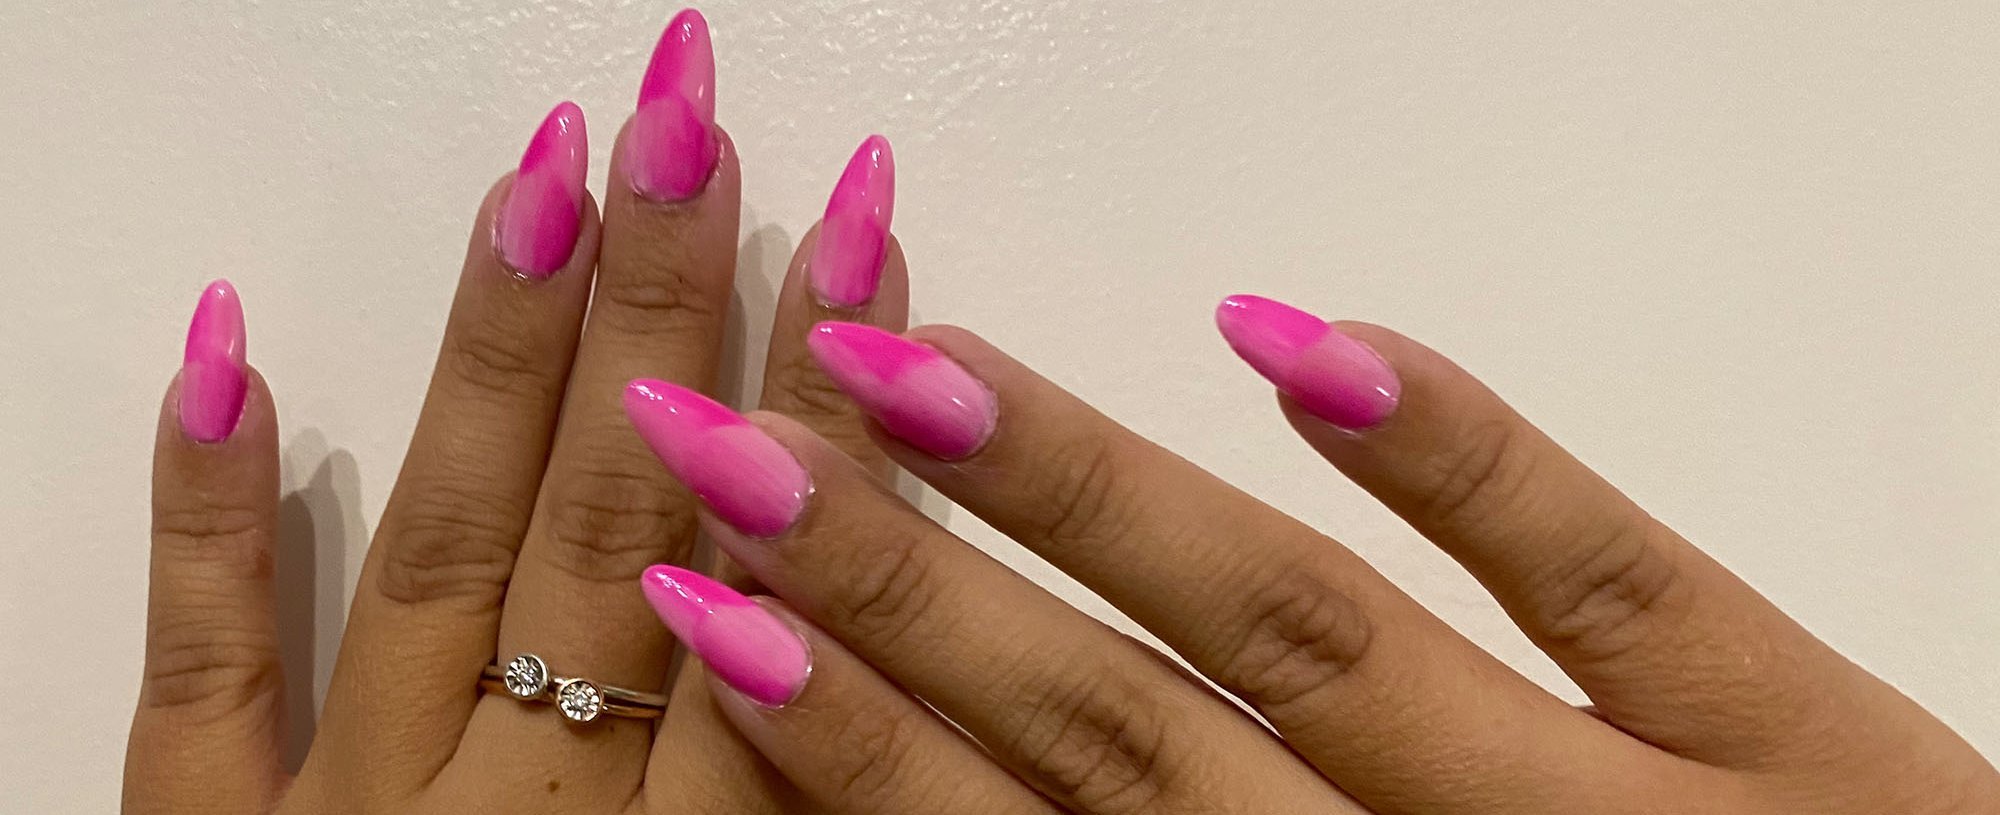
My bookmarks folder on Instagram is overflowing with nail inspiration — and I’m not talking neutral, milky nails — it’s more along the lines of chrome, rhinestone designs and elaborate colors stories. What can I say, I am a maximalist to my core. Instagram supports my obsession with flashy nail art, and if you know anything about social media, then you know that there’s always something new trending. The latest player is an ombré version of the French manicure — it’s colorful, bold and very elaborate.
As you would expect, my maximalist heart was immediately intrigued by this upgraded take on the classic French manicure and I knew I had to try it. Read on as I share my thoughts on DIYing one of social media’s trendiest manicures for the season and why it’s definitely a one-and-done attempt.
What Are Ombré French Nails?
Ombré nails are definitely hitting their stride this season and this manicure in particular has a big part in that. The two-tone ombré design paired with French tips is anything but subtle, making it much different from the classic French manicure or creamy ombré nails.
The combo design is a bit louder, much more colorful and the precise detailing is very apparent. Because of this, it’s definitely a more difficult nail design to achieve, whether that be at home or at the salon.
How Do You Do Ombré French Nails?
For a little background, I do my own nails and I find the entire process really relaxing — to the point where I actually look forward to it. I take my time, I do them while I watch TV and I can make my nails as over-the-top as I like. I am by no means a pro but I do a pretty good job.
With that said, before I even started these nails, I was super intimidated because the design is intricate and all the blending looks extremely time-consuming. Immediately after attempting the first nail, it became very clear that all of my thoughts before starting were correct — the blending was going to take a while. Nothing about this nail design was going to be relaxing and I was already dreading the fact that I would have to do my non-dominant hand.
I started off with a layer of light pink polish before attempting the gradient design and having a base color really helped to make my nail polish look smooth. Once the base was dry, I painted half my nail with the dark pink shade and half my nail with the light pink shade. Then I used a clean brush to blend the two colors while the polish was wet.
I only blended the polish in the middle of my nail, trying to connect the two colors to create the gradient effect. Creating the base wasn't awful because I was working with my entire nail and the larger surface area made it a bit easier. Since I was using gel, I cured my nails before moving on to the French part of the design.
Just like the way I attempted the base ombré color, I painted the top half of my nail half dark pink and half light pink. Then, I used a clean brush to blend the two wet polishes together once again, to create the gradient design. I finished with a different clean brush dipped in acetone to remove the excess polish and carve out the shape of the arching French tip.
In my mind, this method made the most sense and seemed like the most effective way to nail this ombré look (no pun intended). While it worked in the long run, it took more than a few tries and definitely tested my patience, especially when I was painting my right hand (dominant hand). Blending the two polishes together to create the ombré French tip was the most difficult part.
While I tend to be a perfectionist with my nails, I settled on a novice attempt with this trying ombré design. Do I think I could perfect this design if I had more practice? Absolutely. Is that something I want to try? Hard pass.
3 Tips for Doing Ombré French Nails At Home
After an amateur attempt at these ombré French nails, here are my tips if you’re planning to DIY this trendy nail art at home.
1. Work With Longer Nails
I think you need longer nails like gel extensions or acrylic nails to attempt the design because on short nails, there just isn’t enough space. If you prefer short nails, I would just create the ombré base and skip on the French tips.
2. Choose Gel Polish Over Traditional Polish
Third, I like using gel nail polish for French tips because you can use acetone to create the arched shape without removing the underlayer of nail polish since it’s cured. While this design could be attempted with traditional nail polish, you would need a thin brush to carve out the perfect shape of the French tip and that just adds more work to an already intricate process.
If you already have all the items at home to attempt this design on your own, go for it. However, I don’t think the design is worth all the effort it takes. If you don’t have all the nail supplies, save your money and head to the salon to get the look. It’s still cheaper than buying all the materials plus the time it takes to do your nails at home, and it’ll probably look a lot better, too.
3. Keep Acetone Close By
I like to keep a little bowl of acetone and an edge brush nearby when I paint my nails to clean up any nail polish that gets on the cuticle. I also prefer to use acetone to clean up my French tips rather than use a thin brush and draw on the shape. Ultimately, it all comes down to preference but acetone helps to clean up any mistakes that you make when you’re using gel nail polish, especially when attempting DIY nail art.
Next: What Are Dip Powder Nails?
Written and photographed by: Reece Andavolgyi
