If you’re a beauty enthusiast, chances are good that you have a contour product or two stashed in your makeup bag. Along with foundation and concealer, contour is often considered a must-have for a flawless, sculpted base. But having contour makeup and knowing how to contour your face are two entirely different things. TikTok tutorials can help steer you in the right direction, of course, but contour application should be tailored to your face shape—so one-size-fits-all tutorials aren’t always the most useful. Fortunately, we’re here to help. Below, we’ll give you the lowdown on what contouring entails, how contour differs from bronzer, and which products you should reach for when contouring your face. Then, we’ll explain how to contour your face like an expert—whether you’re a total newbie or looking to improve your face-sculpting game. Find all the details ahead.
What Is Contouring?
Contouring is a makeup technique that involves manipulating light and shadow to enhance and define how your face looks. By strategically applying darker shades to areas that recede, such as the hollows of the cheeks and the sides of your nose, and lighter shades to areas that protrude, like the cheekbones and brow bones, contouring creates the illusion of more sculpted features. This method can help to make certain areas appear slimmer, add depth and dimension to others, and create an overall more symmetrical appearance. While contouring has long been a makeup artist technique, in the last decade or so it’s also become a major beauty trend for pros and casual makeup wearers alike.
Do You Contour Before or After Foundation?
You can contour before foundation or after foundation—it’s really up to you and the effect you’re seeking. Applying foundation first is the more standard practice. This order of application gives you a nice, even base to layer your contour on top of. It also is better for getting a more sculpted, bold look, as your contour makeup doesn’t get diffused with foundation.
As for applying contour first, this technique, known as underpainting, has recently gone viral on TikTok. Beyond trendiness, this method has its perks. It involves applying your contour first, along with your blush, before blending foundation on top. The result is a less chiseled but more natural-looking finish.
What’s the Difference Between Contour and Bronzer?
Contour and bronzer are two different types of makeup products. Contour creates the illusion of shadows for a more sculpted appearance, while bronzer deposits color to warm up your visage for a sunkissed look. Both are great, but they have different purposes.
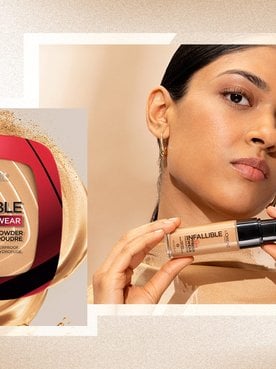
Typically, it’s not recommended to use bronzer to contour. This is because contour products are traditionally cool-toned—this is what allows them to mimic the look of shadows. Bronzers, on the other hand, are typically quite warm-toned. When you use one to contour, it can look less natural. However, there may be some bronzers that can work as contour colors, depending on your skin tone and desired result. The L’Oréal Paris Infallible Up to 24H Fresh Wear Soft Matte Bronzer, for example, comes in shades that can be used for contouring.
It’s also worth noting that it doesn’t have to be a question of contour vs. bronzer. You can use both, layering them to add extra depth.
Shop the Products
Shop the Products
What Products Should You Use to Contour?
When it comes to products for contouring, you have options. There are liquid contour products, creams and sticks, and powders. You might have a personal preference for one of these types, but beyond that, it’s worth considering what will work best with your skin type. Those with oily skin may find that a matte powder contour lasts longest on their skin. Cream and liquid contour products are great choices for those with dry skin as they won’t look cakey. Creams, in particular, are also easy to work with, making them the ideal contouring makeup for beginners.
When you’re picking out a contour product, keep in mind that concealers can be a great option. In fact, contouring with concealer is the latest beauty hack to go viral. If you want to try this hack, pick up the L’Oréal Paris True Match Radiant Serum Concealer, selecting a concealer one to two shades deeper than your skin tone. You’ll use the iron-shaped applicator to precisely apply it to spots you want to contour. The same concealer can also be used as a highlighter if you pick a shade down from your natural skin tone.
For more subtle sculpting, we also love L’Oréal Paris True Match Lumi Glotion Natural Glow Enhancer. The effect will be more sunkissed and bronzed, but you can still really make your features pop.
Shop the Products
Shop the Products
How to Contour Your Face
As easy as it would make things, contouring is not one size fits all. Here’s how to contour your face in five simple steps, starting with determining your face shape—we promise this piece of information will make a huge difference in your makeup look.
Step 1. Determine your face shape
How you should contour depends on your face shape, which means to get the best defined and highlighted results, you’ll need to know your face shape. There are six common shapes in total: round, oval, square, heart-shaped, rectangle, and diamond.
If you aren’t sure which you have, here’s a quick overview of what to look for when determining yours:
Round: A face that’s equal in length and width; round, curved edges
Oval: A face that’s slightly longer than it is wide, with slightly curved edges
Square: A face that’s equal in length and width; angular and defined edges
Heart-Shaped: A wider forehead with a smaller jawline and chin; prominent cheekbones
Rectangle: A face that’s longer than it is wide; square jawline
Diamond: A longer face with a pointed chin and narrow hairline
For more guidance, read our article on How to Identify Your Face Shape.
Step 2. Find your contouring products
To contour the right way, you’ll need two products: one for highlighting and another for contouring. The reason why it’s helpful to use two products is because one adds brightness and the other creates shadows to emphasize the definition you’re trying to create.
We recommend using two concealers from the same line: one lighter shade as your highlighter and one darker shade to contour. This way, they’ll have the same formula, which can help make for easier blending and a more even result. As mentioned, L’Oréal Paris True Match Radiant Serum Concealer is a great concealer to contour with.
The L’Oréal Paris Infallible Full Wear Concealer up to 24H Full Coverage can also be used to contour (and conceal, and highlight!). This full-coverage, matte concealer provides a flawless finish for 24 hours. It’s even waterproof, which makes it a great pick if you’re planning to work up a sweat or get caught in the rain.
Shop the Products
Shop the Products
Step 3. Apply your base makeup
Once you have your contour products at the ready, start by prepping your face with a primer, like L’Oréal Paris Prime Lab Up to 24H Matte Setter. This mattifying formula will create a smooth surface for the rest of your makeup, reduce excess shine, and extend the wear of your makeup for up to 24 hours.
Unless you want to underpaint, you can apply your foundation next. Consider coordinating your concealer and foundation. For example, if you plan to use the L’Oréal Paris True Match Radiant Serum Concealer, pair it with L’Oréal Paris True Match Super-Blendable Foundation.
Shop the Products
Shop the Products
Step 4. Contour your face
Now, you’re ready to contour. Start by applying the light highlighter (concealer) shade on areas of your face that you want to draw attention to. Typically, this is under the eyes, down the center of the nose, and across the tops of the cheekbones.
You can also apply a small amount of product to the center of the forehead and chin to bring more light and dimension to those areas. After applying your concealer, use a stippling brush to blend out the product and soften any harsh edges. Be sure to only blend the product into your target areas; if you begin moving the lighter makeup all around your face, you won’t get the sculpted look you’re after.
Next, apply the darker shade of concealer to the areas you want to define. Standard spots to contour include the sides of your nose, hollows of your cheeks, jawline, and temples. You can also contour other areas, depending on the effect you want. If you want fuller-looking lips, for example, you can contour the bottom of your lower lip. Apply the darker concealer under the center of your bottom lip line, and add your highlighter to your cupid’s bow.
You should apply your contour product to all your target areas using small dots or lines, then blend it out with a brush or makeup sponge.
How to contour based on your face shape
Once you understand the general contour guidelines above, you get more personalized and factor in your face shape. Below, find a breakdown of how to contour for each shape.
Round: Apply contour along the temples, under the cheekbones, and along the jawline to add definition and create the illusion of length.
Oval: Contour along the outer edges of the forehead, under the cheekbones, and along the jawline for subtle definition and balance.
Square: Focus contouring on the corners of the forehead, under the cheekbones, and along the jawline to soften angular areas.
Heart-Shaped: Apply contour along the temples, under the cheekbones, and softly under the jawline to create balance.
Rectangle: Focus your contour product on the forehead, temples, and under the cheekbones to soften the angles of your face.
Diamond: Apply contour along the temples, under the cheekbones, and lightly along the jawline to balance the width of the cheekbones with the narrower forehead and chin.
Step 5. Set your makeup
After putting in all that effort to sculpt and define your face, it’s important to make sure your contour stays in place throughout the day. Go ahead and seal in your look with a few spritzes of L’Oréal Paris Infallible Pro-Spray & Set Makeup Extender Setting Spray for a long-lasting beat.
Shop the Products
Shop the Products
Contouring Makeup for Beginners
If you’re still feeling intimidated by learning how to contour your face, we’ll share one of our favorite, and most importantly, easiest techniques. The “3” method takes all the guesswork out of contouring, turning it into something even makeup beginners can master. Here’s a quick and basic contour tutorial using this technique :
Step 1: Draw “3” shapes
Using a concealer one shade deeper than your skin tone (a subtle difference tends to be better for beginners), draw your contour in the shape of a 3 on each side of your face. Start at the middle of your forehead, then curve the line down to your cheekbone, before sweeping it down to your jawline. When you finish, it should look like the number 3 (or an E, depending on which side of your face you drew it on). This simple shape adds shading to all the key areas of your face—temples, cheekbones, and jaw—without requiring a ton of precision.
Step 2: Blend out your contour
Once you’ve placed your contour, you need to blend it out to blur any harsh lines. A buffer or stippling brush works best for this. Use light circular motions to go over the contour until it blends into your base.
Step 3: Add your highlighter
To complete your sculpting session, add highlighter. Apply it in the shape of a sideward V, going from the brow bone out to the temples then back in along the upper cheekbone. For a little extra “pop,” use a shimmer highlighter—it will really reflect light and stand out.
Next Up: How to Contour Your Nose Like a Pro
Photo Courtesy of L'Oréal Paris


