Have you ever watched a movie and paused to appreciate the special effects makeup? Us, too! While we love traditional makeup looks, special FX makeup is a whole other ballgame. The best special effects makeup schools and kits give these makeup artists the tools to completely transform people—from fake wounds to fake eyeballs. But, you don’t have to attend school to get started with SFX makeup. In fact, with the right tips and tricks, you can master faking wrinkles, bruises, and more with makeup. Ready to take your makeup skills to new heights? Read on to learn how to build a special effects makeup kit, along with three beginner SFX makeup ideas you can try.
THREE THINGS TO KNOW ABOUT SFX MAKEUP
So, you know what special effects makeup is, but how exactly does it differ from traditional makeup? Before we talk about how to DIY an SFX makeup kit, here are three things you should know.
#1. YOU WON’T BE USING REGULAR MAKEUP
Wondering what makeup to use for special effects? Spoiler alert: There’s a bit more required than the foundation and eyeliner you already have stashed in your makeup bag. Things like fake blood and liquid latex will become your new makeup essentials. Simply put, special FX makeup is a bit more heavy-duty.
#2. IT CAN GET PRICEY
How much does special FX makeup cost? We won’t lie and say it’s the most budget-friendly. Depending on the products you choose, expect your kit to cost you anywhere from $60 to $200. Whew! That said, you likely won’t be wearing or using special effects makeup as often as you do your normal makeup, so you won’t need to replenish it as frequently.
#3. START SMALL
Going off of the fact that SFX makeup can be expensive, you’ll want to make sure you’re committed to learning the technique and perfecting your skills. So, before you go and buy the larger size of every product in your kit, make sure you enjoy it and want to continue pursuing the craft!
HOW TO BUILD A SPECIAL EFFECTS MAKEUP KIT
Ready to build your kit? As a beginner, here are the essentials you’ll want to include in your SFX makeup starter kit.
#1. Liquid latex. Remember when we mentioned liquid latex? This is what’s used to create believable burns and cuts.
#2. Castor seal. Used hand-in-hand with liquid latex, this is applied on top so that it’s easier for makeup to go on smoothly, as well as show up true to color.
#3. Applicators. Something familiar! The applicators needed for special effects makeup include a variety of makeup sponges and brushes, as well as items like cotton swabs. As you continue to perfect your craft, you’ll find there are many sponges made for providing different textures, which will help your special FX makeup look more realistic.
#4. Palette. As you can probably imagine, a lot of color mixing goes into special effects makeup, so you’ll want to have a clean palette to work with.
#5. Bruise wheel. Yup—this is a thing! A bruise wheel is a palette that contains an array colors, including browns, purples, reds, and yellows, all meant for creating fake bruises, which are very common in special SX makeup.
#6. Water-soluble glue. This adhesive will allow you to glue things like hair and fake noses into place. You’ll also want to have a glue remover.
#7. 3D modeling compound. You’ll use this to sculpt 3D skin objects, like those fake noses we mentioned.
#8. Fake blood. Need we say more?
3 EASY SFX MAKEUP IDEAS FOR BEGINNERS
Once you have your kit, we’re sure you’ll want to put it to use! But, how do you do special effects makeup? While SFX makeup certainly isn’t easy, there are a few basic looks beginners can pull off with ease. Here are three.
#1. SCARS
One of the easiest SFX makeup ideas you can try is creating fake scars.
What you’ll need:
Eyelash glue
Small eyeliner brush
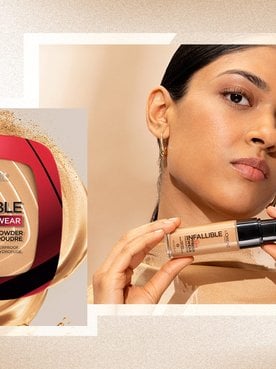
L’Oréal Paris Infallible Full Wear Concealer Waterproof, Full Coverage
Concealer brush
L’Oréal Paris Infallible 24 Hour Fresh Wear Foundation, Lightweight
L’Oréal Paris Colour Riche Monos Eyeshadow in Mademoiselle Pink
Matte light purple eyeshadow
Get the look:
Step 1. Paint your glue. Using a small eyeliner brush, paint a thick line of eyelash glue where you would like your scar to be.
Step 2. Move the glue. As the glue starts to dry, use your finger to push the sides toward the center, causing the glue to ball up. This will end up creating the texture of your scar, so move and play with the glue as you see fit. If you want a more prominent scar, add another layer of lash glue and repeat the process.
Step 3. Apply concealer. Using a full-coverage concealer, take a concealer brush, and pat the formula over your glue scar.
Step 4. And foundation. Bounce foundation all over your complexion, taking care to only bounce, not blend, over your scar. It’s also a must to use a foundation that can be built to full coverage. After you’re finished applying, blend any areas around your scar carefully with your finger.
Step 5. Shade. To make your scar look realistic, you’ll want to color it in. First, use a light pink matte eyeshadow to color overtop your “scar,” following the glue exactly. Then, take a thin eyeliner brush and apply a light purple matte shade around the sides of your scar, which will create more dimension. That’s it!
#2. CUTS
Want to fake a cut or wound? This is one of the most common special effects makeup techniques. It may take a few tries to master, but it’s actually quite simple once you get the hang of it!
What you’ll need:
L’Oréal Paris Le Liner Signature Easy-Glide Mechanical Eyeliner, Waterproof in Violet Wool
Water-soluble glue
Cotton pad
Scissors
Powder foundation
Red liquid lipstick
Purple liquid lipstick
Cotton swabs
Matte purple eyeshadow
Get the look:
Step 1. Outline your cut. Draw a circle—or whichever shape you prefer—using a violet eyeliner.
Step 2. Cut and place your cotton pad. Cut your pad so that it is an outline of the wound you drew. This will act as the raised skin around your cut, so don’t worry if it isn’t perfect! That said, you’ll want to make sure the perimeter isn’t too thick or bulky. Use water-soluble glue to secure the cotton pad into place.
Step 3. Conceal. Once the glue has dried, use a powder foundation to cover the cotton pad and blend it with your skin. Take care not to move the cotton pad while doing this!
Step 4. Grab your eyeshadow. Dust a matte purple eyeshadow around the outside of your cut.
Step 5. Fill it in. For your fake blood, feel free to use the real deal (and by real, we mean actual fake blood) or a bit of red and purple liquid lipstick. Apply the red to the outer rim of the inside of your wound, then use the purple in the center. Use a cotton swab to blend the shades together for a more realistic appearance.
Editor’s note: Want to incorporate fake cuts into a full look? Check out how we used wounds as part of a zombie makeup look.
#3. BURNS
Last but not least, let’s go over how to create fake burns.
What you’ll need:
Plain gelatin
Cosmetic spatula
Powder foundation
Matte deep red eyeshadow
Small eyeshadow brush
Matte bright red eyeshadow
Matte black eyeshadow
Concealer
Makeup sponge
Get the look:
Step 1. Apply your gelatin. After mixing your gelatin, apply it where you would like the burn to be. Start by applying randomly, then, as the gelatin becomes tackier, pull and play with it to create the shape of your burn.
Step 2. Grab your powder. After giving the gelatin time to dry, carefully sweep a small amount of powder foundation on top.
Step 3. Fill it in. This is the fun part! First, apply a deep red shade where you would like the deepest part of the burn to be. Then, use a bright red and apply it along the outside of the burn, as well as alongside the deep red shade. To deepen the wound, layer a small amount of black eyeshadow over the deep red where you see fit. You’ll want to make sure you’re only using matte eyeshadows for this.
Step 4. Conceal. For a blended look, use a makeup sponge to pat concealer in a shade that matches your skin tone over the burn. This will add more dimension to the look and help everything appear seamless. All done!
